How to configure PHP to Apache
Apache:
Apache is a HTTP server which turns your computer to a web server. It is the most popular HTTP server. According to the Netcraft web site Apache is running over 34 million Internet servers, more than Microsoft, Sun ONE, and Zeus combined. Its flexibility, power and of course price make it popular choice. It can be used to host a website for the general public or a company- wide internet or for simply testing your pages before they are uploaded to a secure server on another machine.
Apache is a HTTP server which turns your computer to a web server. It is the most popular HTTP server. According to the Netcraft web site Apache is running over 34 million Internet servers, more than Microsoft, Sun ONE, and Zeus combined. Its flexibility, power and of course price make it popular choice. It can be used to host a website for the general public or a company- wide internet or for simply testing your pages before they are uploaded to a secure server on another machine.
PHP:
PHP is a server-side scripting language that allows your web site to be truly dynamic. PHP stands for Hypertext Preprocessor (it is acronym). Its flexibility and relatively small learning curve make it one of the most popular scripting languages around. According to the Netcraft PHP can now be found in approximately 16 million websites.
Configure PHP to Apache on your own computer
Now we will master how to configure PHP 5.2.x to Apache 2.2.x on your computer. Do the following steps:
1. Download the Apache from it’s website. Go to http://www.apache.org and click the HTTP server link. You should download Win 32 binary (MSI installer).
2. Setup the Apache.
3. Go to http://www.php.net. Click on binary section and click the PHP zip package link.
4. Click any FTP site to begin the download.
5. Unzip your PHP folder and place it to any directory. I recommend placing it to c:/php.
We have completed the Installation of PHP and Apache. Now we will do some customization so that Apache can parse your lovely PHP files. Go to the PHP folder where you saved it to and do the following 2 steps:
1. Find the php.ini-dist file and rename it to php.ini. Make sure to save your new php.ini file to your c:/windows (or c:/winnt) directory so Apache can find it.
2. Copy php5ts.dll into the c:/windows/system32 or the c:/winnt/system32 directory so that Apache can find it.
In order to for Apache to recognize a PHP file as one that needs to be parsed with the PHP engine, we have to customize the httpd.conf file. You will find to C:/Program Files/Apache Software Foundation/Apache2.2/conf. Now locate the following lines:
#
# AddType allows you to add to or override the MIME configuration
# file specified in TypesConfig for specific file types.
#
#AddType application/x-gzip .tgz
Then add the following lines:
AddType application/x-httpd-php .php
AddType application/x-httpd-php-source .phps
Now add the PHP module into your httpd.conf program. Locate the following line:
#LoadModule ssl_module modules/mod_ssl.so
Then add this line:
LoadModule php5_module "c:/php/php5apache2_2.dll" (If you use PHP 5 and Apache 2.0 then add this line LoadModule php5_module "c:/php/php5apache2.dll")
Restart the Apache program so that it can recognize the changes you have made.
Now it is the time to test your PHP files. Open your favorite text editor and write the following program:
<html>
<head>
<title>PHP testing<title>
</head>
<body>
<?php
echo "If this work we did it";
?>
</body>
</html>
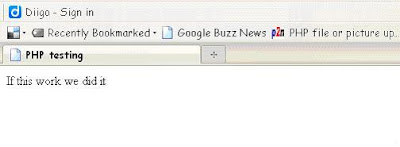
You screen should look like this.


No comments